How to Reset Admin Password on Zmodo Dvr
Tablo DVR users: These tips will help you get the most out of it
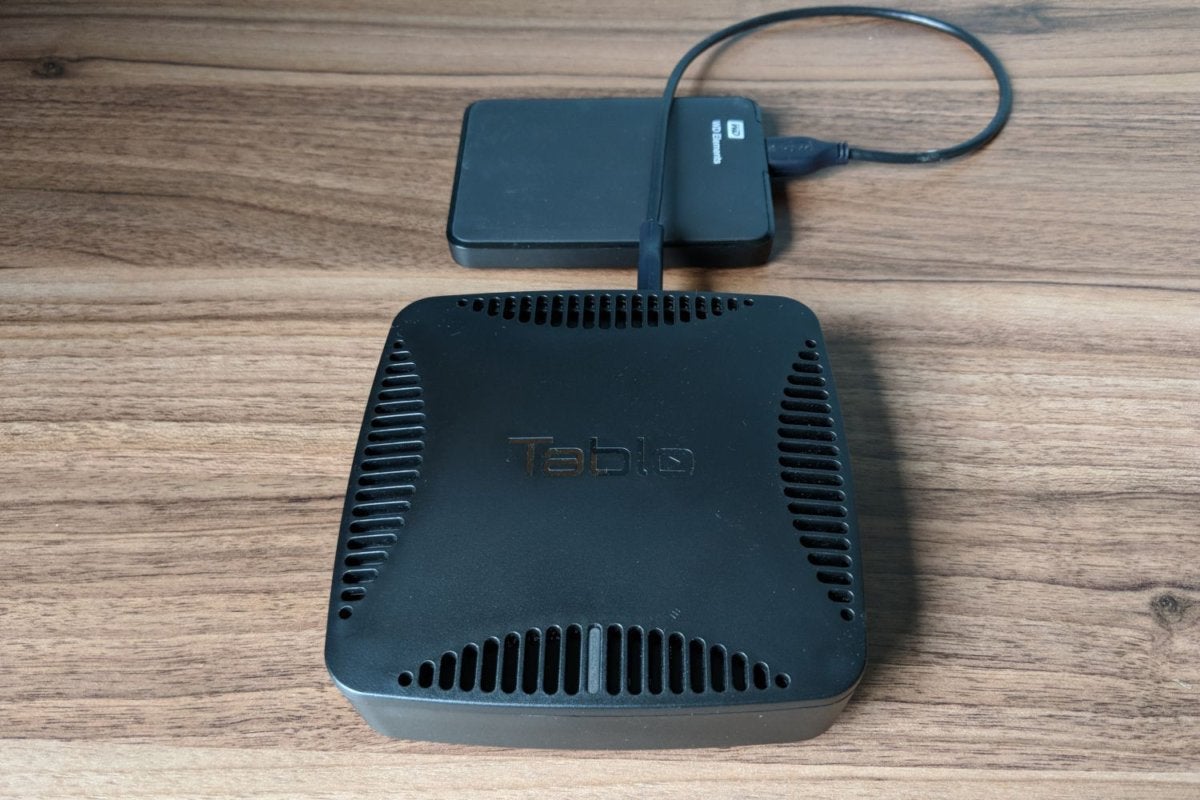
tabloduallite-100755498
Today's Best Tech Deals
Picked by TechHive's Editors
Top Deals On Great Products
Picked by Techconnect's Editors
- Manage your DVR from the web
- Get the best video quality
- Use advanced recording and protection to maximize storage space
- Leave nothing to chance with manual recordings
- Use your remote's Play button as a shortcut
- Filter out unwanted channels
Show More
One of the reasons we appreciate Nuvyyo's Tablo DVRs (including the new Dual Lite model) is that they're easy to set up and use. Tablo isn't the most powerful over-the-air DVR for cord-cutters, but it is the most hassle-free.
While Tablo works just fine out of the box, you can make it even better with some extra settings and hidden tricks. Here are seven not-so-obvious ways to get the most out of your Tablo DVR:
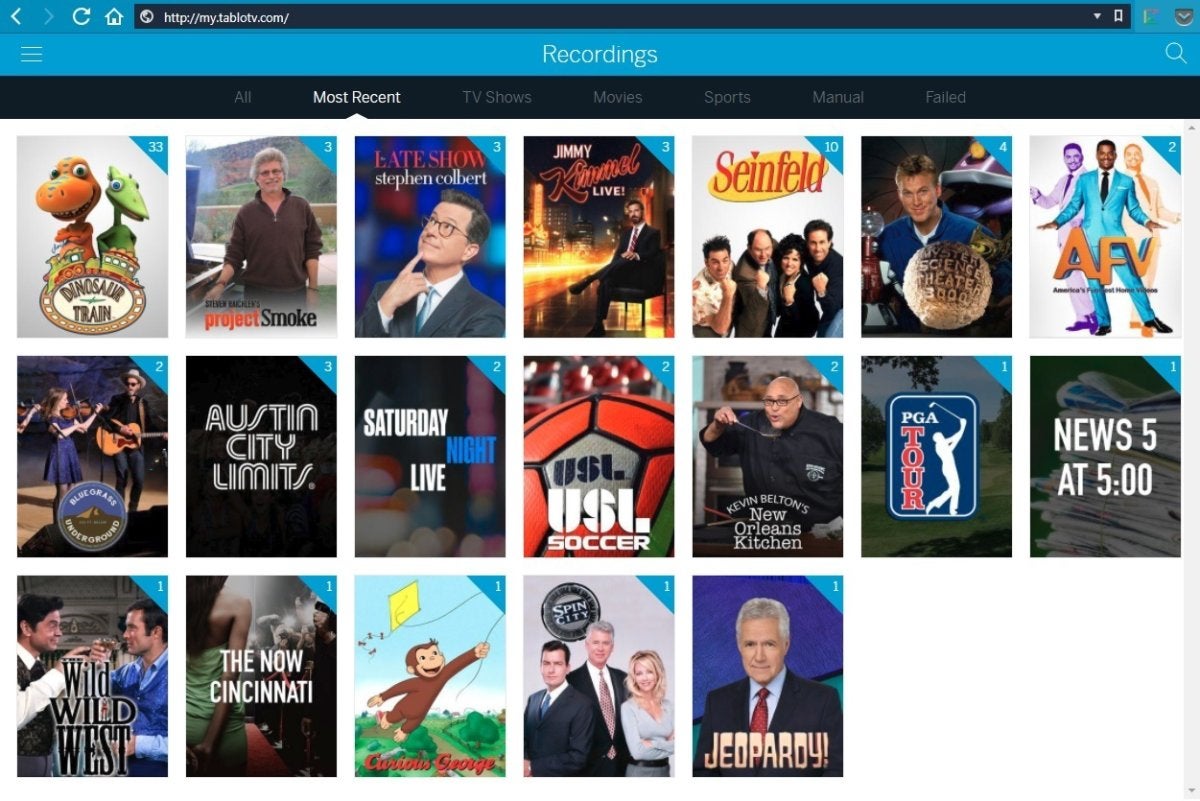
Manage your DVR from the web
Although you can schedule recordings from most of Tablo's apps, using a web browser is easier. You can see more information at once compared to Tablo's mobile apps, and pointing and clicking with a trackpad or mouse is faster than mashing remote buttons in Tablo's TV apps. You can also open Tablo's web app in multiple windows to watch TV and browse the channel guide at the same time—a capability that's sorely missing from the native Tablo apps. Head to my.tablotv.com to get started.
 Jared Newman / TechHive
 Get the best video quality
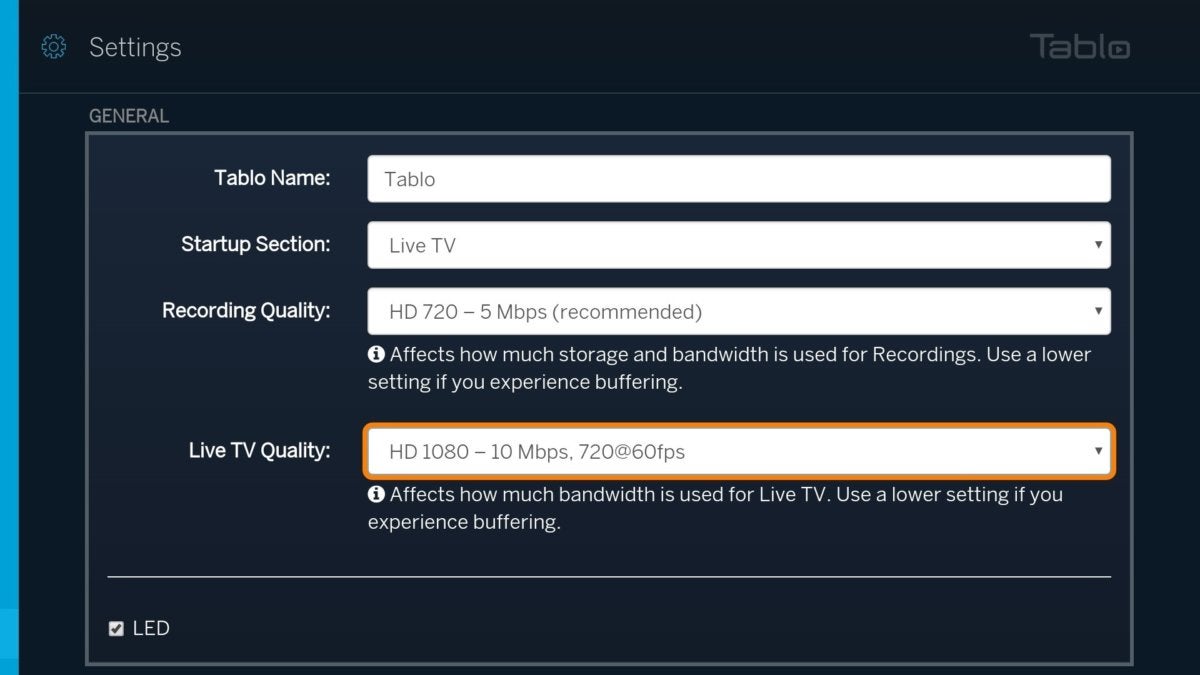 Jared Newman / TechHive
 By default, Tablo streams and records TV at 5Mbps. This limits video resolution to 720p and framerate to 30 frames per second. If you have a strong Wi-Fi connection, consider cranking up the video quality in Tablo's settings menu. Choosing the 10Mbps option will give you 1080p at 30 frames per second on some channels, and 720p at up to 60 frames per second on other channels.
Just keep in mind that cranking up Tablo's recording quality will also consume more storage space.
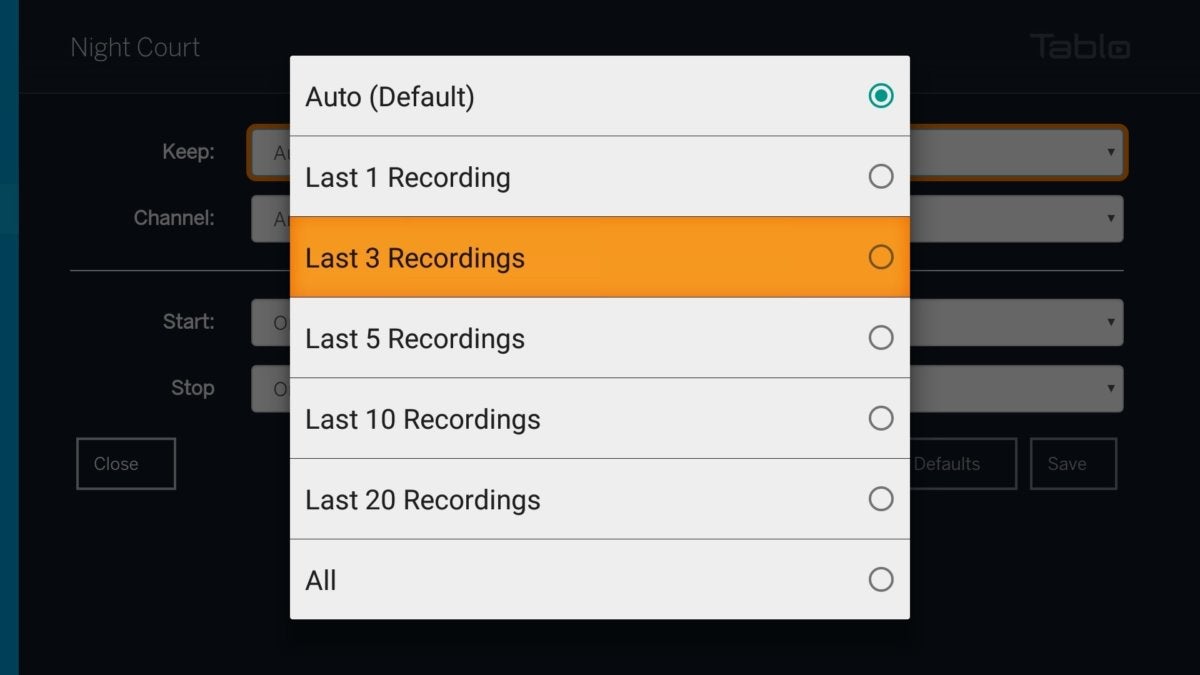
Use advanced recording and protection to maximize storage space
 Jared Newman / TechHive
 To avoid filling up your hard drive with unwanted recordings, you can have Tablo manage storage automatically by checking the "Auto-Delete Recordings" option from the settings menu. With this option enabled, Tablo will automatically remove the oldest, already-watched recordings when your hard drive is almost out of space. To spare old programs from deletion, select any individual episode from your Recordings list, then choose "Protect."
You can also proactively cut down on storage use with Tablo's advanced recording options. When viewing a program, select "Options," then select "Keep." From here, you can choose to keep only a certain number of recent episodes. This is helpful for limiting your recordings of news, sports, and talk shows that you're unlikely to binge watch in the future.
Leave nothing to chance with manual recordings
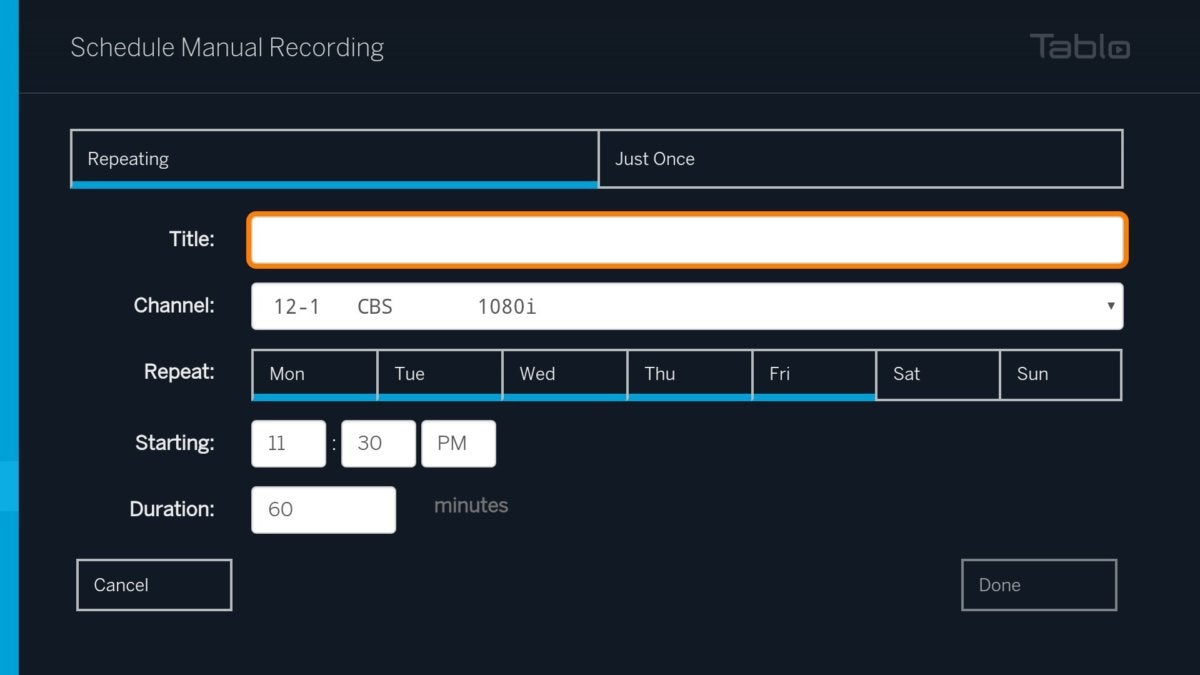 Jared Newman / TechHive
 Tablo offers a couple of simple ways to avoid having your favorite programs or live events cut short. Selecting "Extend Live Recordings" from the Settings menu will automatically add 50 percent extra recording time to sports and live events. You can also visit the advanced recordings menu and select "Adjust Start/Stop Time" to add up to three hours of buffer time to an event.
If that's not enough, however, Tablo allows you to schedule recordings manually. Head to the "Scheduled" section in the Tablo app, then hit the "+" button. From here, you can choose a repeating or one-time recording, give it a name, select the channel, and choose a precise recording time. (Some Tablo apps, such as Roku or Apple TV, don't offer this option, but you can still use Tablo's mobile apps or website to create the recordings.)
Use your remote's Play button as a shortcut
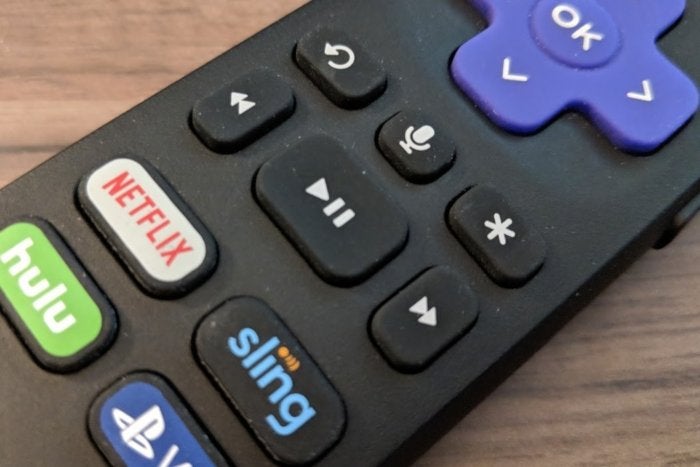 Jared Newman / TechHive
 With streaming devices like Roku and Apple TV, using your remote's select button to choose a program will first bring up a menu of recording options. Save yourself a little time by pressing the play button instead. This will jump straight to the live video from the viewing guide, or to your latest unwatched episode from the recording list.
Filter out unwanted channels
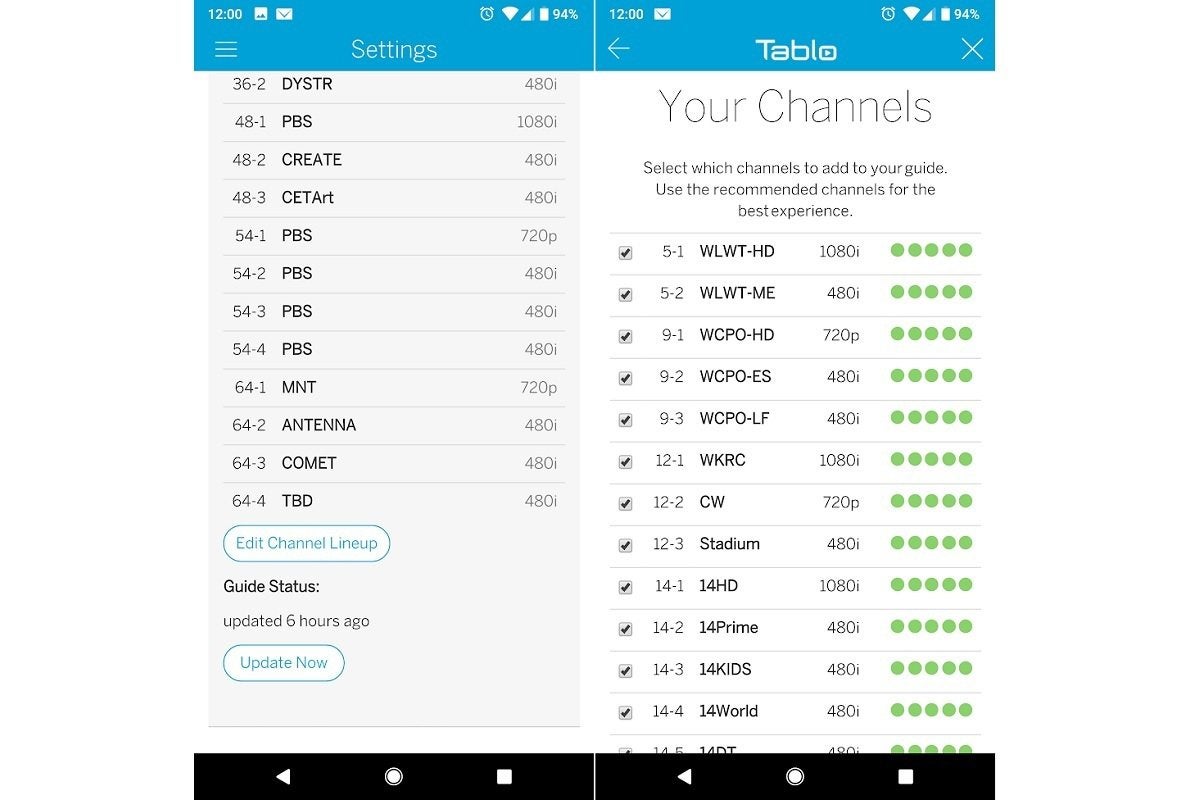 Jared Newman / TechHive
 When setting up Tablo for the first time, you can choose which channels appear and don't appear in the live TV guide. If you ever need to select your channels again, just head to Settings, go to the bottom of the "Guide" section, and select "Edit Channel Lineup."
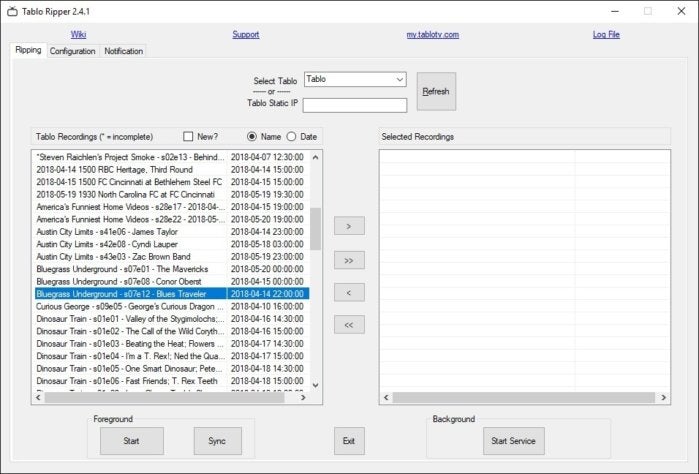
Offload your Tablo recordings for use elsewhere
 Jared Newman / TechHive
 Tablo doesn't currently offer a built-in way to save your recordings for offline viewing. Fortunately, a free Windows program called Tablo Ripper can pull those recordings onto your computer. That way, you can transfer them onto other devices, stream them outside the home for free using Plex, or even remove the commercials with post-processing software such as MCEBuddy. (Mac users can try Tablo Exporter instead, but we haven't tested it.)
To get started, download and install the latest version of Tablo Ripper. When you run the software, it should automatically detect the Tablo on your Wi-Fi network and present a list of recordings. Use the ">" key to select which recordings to grab, or hit ">>" to grab them all, then hit "Start." (You may want to visit the configuration tab first to specify a recording location outside of Tablo Ripper's default folder.) Let Tablo Ripper work its magic, and you'll have a set of MP4 files that you can take anywhere. For more information on how to tweak the software, check out Tablo Ripper's configuration guide.
Note: When you purchase something after clicking links in our articles, we may earn a small commission. Read our affiliate link policy for more details.
Jared Newman covers personal technology from his remote Cincinnati outpost. He also publishes two newsletters, Advisorator for tech advice and Cord Cutter Weekly for help with ditching cable or satellite TV.
How to Reset Admin Password on Zmodo Dvr
Source: https://www.techhive.com/article/3273709/tablo-dvr-tips.html